Every kitchen remodeling job begins with a packing and purging party as you set up your temporary cooking space. We frequently advise our clients to take this opportunity to thoroughly assess each item in their kitchen and only keep what they truly love and need! Our own experience has taught us that it’s best to go through and organize your kitchen as soon as the remodeling process starts. Our ideal approach is to take everything out of your cabinets and drawers, evaluate each item’s worth, and then decide whether to keep it. Yes, it is a lot of work and might be daunting, but it is so, so worth it. For more information.
Once you’ve finished, it’s time to pack your stuff and prepare for your makeover.
1. Choose a site for your temporary kitchen.
Because many of our clients remain at home while having their kitchens remodeled, it’s essential for them to have a small room set up to serve as a temporary “kitchen” space. Every home (and family’s demands) are different, thus we are more than pleased to help you choose a spot in your home that is suitable for this. If necessary, a laundry room can also be substituted with a second bathroom that is close to a prep area.
2. Set aside anything you’ll need for the renovation.
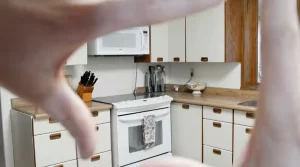
But the basics ought to remain outside! We advise having a coffee maker, a toaster oven, and a microwave, as well as one set of dishes, glasses, and utensils for each person residing in your home. Any meals you anticipate cooking at home while remodeling should be prepared in advance. By completing any essential food preparation in advance, you can reduce the cost of takeout.
Keep things simple because you’ll be handwashing everything you use. If you wish to reduce the effort of dishwashing, think about using recyclable or biodegradable disposals. It’s also a great chance to use up all of your mismatched party plates, cups, and napkins from previous get-togethers.
3. Have your kitchen items ready for storage while the house is being built.
The finest packing supplies are tiny and medium-sized boxes, packing paper, and bubble wrap. While you pack, your possessions stay tidy, safe, and arranged! Don’t forget to label your boxes so that you can swiftly set up your kitchen once everything is ready. A great post.
4. It’s time to clean the house.
Because many of our clients remain at home while having their kitchens remodeled, it’s essential for them to have a small room set up to serve as a temporary “kitchen” space. We’ll no doubt be able to help you choose a room in your home that’s suitable for this.
To keep you more organized, we advise packing each category separately. To find out what you have, search your cupboards and drawers for complementary items. Give the items you’ve accumulated but never utilized. There is no need to keep things if you aren’t using them. Take into account the following tips for clearing up each category:
Throw away any dinnerware sets that you don’t use or adore. If you intend to sell them, snap some photos of them right away. Before throwing away the set(s), inspect them for chips and cracks. If the glazing is broken or chipped, your food may be contaminated with dangerous germs (if not sanitized properly).
Serving and entertaining utensils are usually bulky and challenging to store items. Find the extraneous stuff that doesn’t fit your hosting style and take them out of your entertainment.
Mugs and promotional cups are surprisingly difficult to get rid of because they typically hold sentimental value. Pull everything out of the cabinets so you can view everything at once. Decide which items you want to keep and why. If you have a collection of mugs, it might be a good idea to keep them elsewhere in the house or to incorporate a showcase space when redesigning your kitchen.
I’m always amazed at how quickly our Tupperware drawer fills up! I always start by determining which containers require corresponding lids before discarding or giving anything.
Do all of your tiny appliances and electronics meet your needs and way of life? Try to keep your attention as much as you can on whether the item is helpful to you right now rather than if it might be useful in the future. You can then decide if you genuinely value the idea rather than just considering using it. Donate any appliances that are no longer in use.
Extras: Minimize the number of surplus items you’ve been storing and get rid of anything that is no longer helpful (think warped spatulas, peelings nonstick pans, etc.).
5. Before keeping something, give it some thought.
If you’re unsure about what to take, consider your current lifestyle and what you may have coming up in the near future. After the renovation is complete and it’s time to move into your new kitchen, you’ll be glad you took the time to get rid of unnecessary items. There is less packing, storing, and unpacking required.
We want to know what helped you get through the kitchen renovation. If you would, comment here. As you prepare for your future kitchen renovation, we hope that these ideas will serve as inspiration. If you’re still looking for a contractor, Contact our team to schedule an appointment. You’re interested in learning how to prepare for a bathroom renovation. We’ve got you covered!